How to Apply Paint Protection Film: What the Pros Do Differently

GET A FREE ESTIMATE

CALL (912) 656-6947

May 15, 2025

If you truly care about your car’s appearance, then protecting its paint isn’t just a priority—it’s a necessity. Between road debris, harsh weather, and UV exposure, your vehicle faces a daily battle against damage. That’s where professional Paint Protection Film (PPF) services come in. At Northern Lights Home & Auto Coatings, we offer expertly applied PPF that acts like an invisible armor, preserving your car’s showroom shine while protecting it from scratches, chips, and fading. In this guide, we’ll walk you through what goes into a professional PPF installation so you can see why trusting the pros makes all the difference when it comes to long-term paint protection.


What is Paint Protection Film (PPF)?


Paint Protection Film, or PPF, is a virtually invisible urethane layer that protects your vehicle’s painted surfaces from the hazards of daily driving—stone chips, road debris, bug splatter, and UV rays. At Northern Lights Home & Auto Coatings, we treat PPF not just as a product but as a long-term investment in your car’s condition and value.

One standout feature of high-quality PPF is its self-healing property. Minor scratches fade with heat exposure—sunlight or warm water—allowing your vehicle to maintain that fresh-off-the-lot look. According to industry data, professionally installed PPF can help preserve a car’s paint condition up to 30% better over five years, with the added potential of increasing resale value by thousands, depending on market trends.


While DIY kits may appeal to budget-conscious owners, the reality is that achieving clean, precise application—especially on contoured surfaces—is best left to trained professionals. A seasoned installer guarantees edge coverage, proper stretching, and zero bubbling, all of which can significantly enhance durability and appearance.


Essential Tools for a Flawless Application


Professional PPF installation requires a specialized toolset and a clean, controlled environment. At Northern Lights Home & Auto Coatings, our technicians rely on


  • Heat gun—used to activate adhesive and contour film to curves

  • Soft-edge squeegee—removes moisture and air bubbles without damaging the film

  • Isopropyl alcohol—eliminates surface oils for maximum adhesion

  • Clay bar—clears micro-contaminants

  • Microfiber towels lift debris without scratching

  • Slip solution—water mixed with a small amount of soap for repositioning

  • Precision blades—used for clean trims and finishing touches

Each tool plays a vital role in avoiding lift lines, premature peeling, or improper alignment. In a professional setting, preparation is half the outcome.


Vehicle Preparation Process

Trained technician stretching and positioning paint protection film on a vehicle.

Before any film touches paint, we begin with thorough vehicle prep to guarantee the best surface for adhesion. This step is absolutely critical—no matter how advanced the film or skilled the installer, poor surface preparation can compromise the entire application. At Northern Lights Home & Auto Coatings, we treat this stage as the foundation of the PPF process because a clean, contaminant-free surface ensures the film bonds correctly and lasts as long as intended. Our prep process doesn’t just clean the vehicle—it removes microscopic debris, oils, and imperfections that could lead to bubbling, lifting, or reduced clarity over time. The extra care we put in here directly translates to a better-looking, longer-lasting finish.


Step 1: Deep Cleaning

Using high-quality automotive shampoo and pressure washers, we strip away dirt, wax, and sealants that might interfere with the film’s bond. Special attention is given to crevices, badges, and trim where debris hides.


Step 2: Surface Decontamination

We follow up with a clay bar treatment to remove embedded contaminants like tar, brake dust, and tree sap. This step creates a glass-smooth finish, ensuring no bumps or grains get trapped under the film.


Step 3: Alcohol Wipe Down

A final wipe with isopropyl alcohol eliminates residual oils. This creates a chemically clean surface, crucial for secure adhesion and long-term film performance.


Installation Steps for PPF


Professional application isn’t just about sticking film to a surface—it’s about precision, alignment, and patience.


Step 1: Measuring and Cutting

Our technicians pre-cut film templates or trim bulk film directly on the vehicle using patterns tailored to each panel. A slight overhang is left to ensure edge wrapping and full coverage.


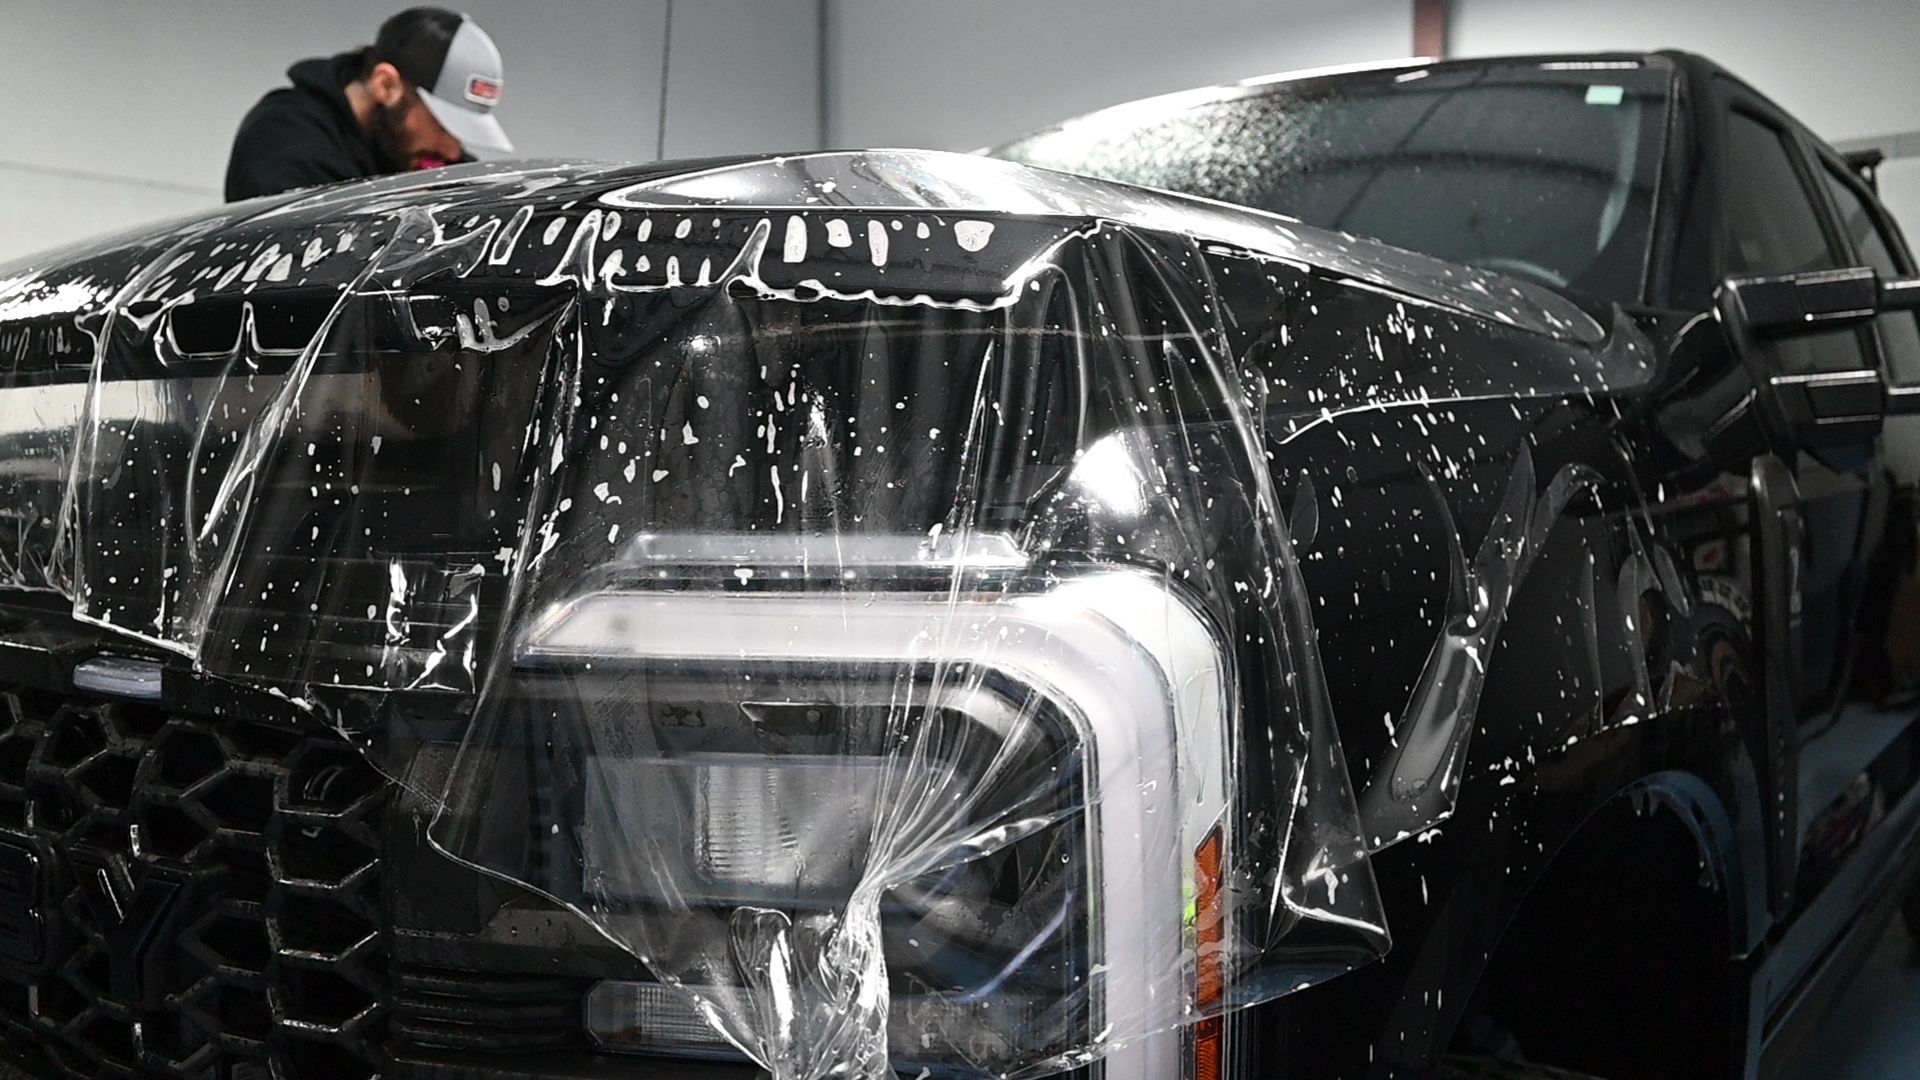
Step 2: Slip Solution Spray

We apply a soap-water mix generously on both the adhesive side of the film and the vehicle’s paint. This temporary lubrication allows repositioning of the film without binding prematurely.


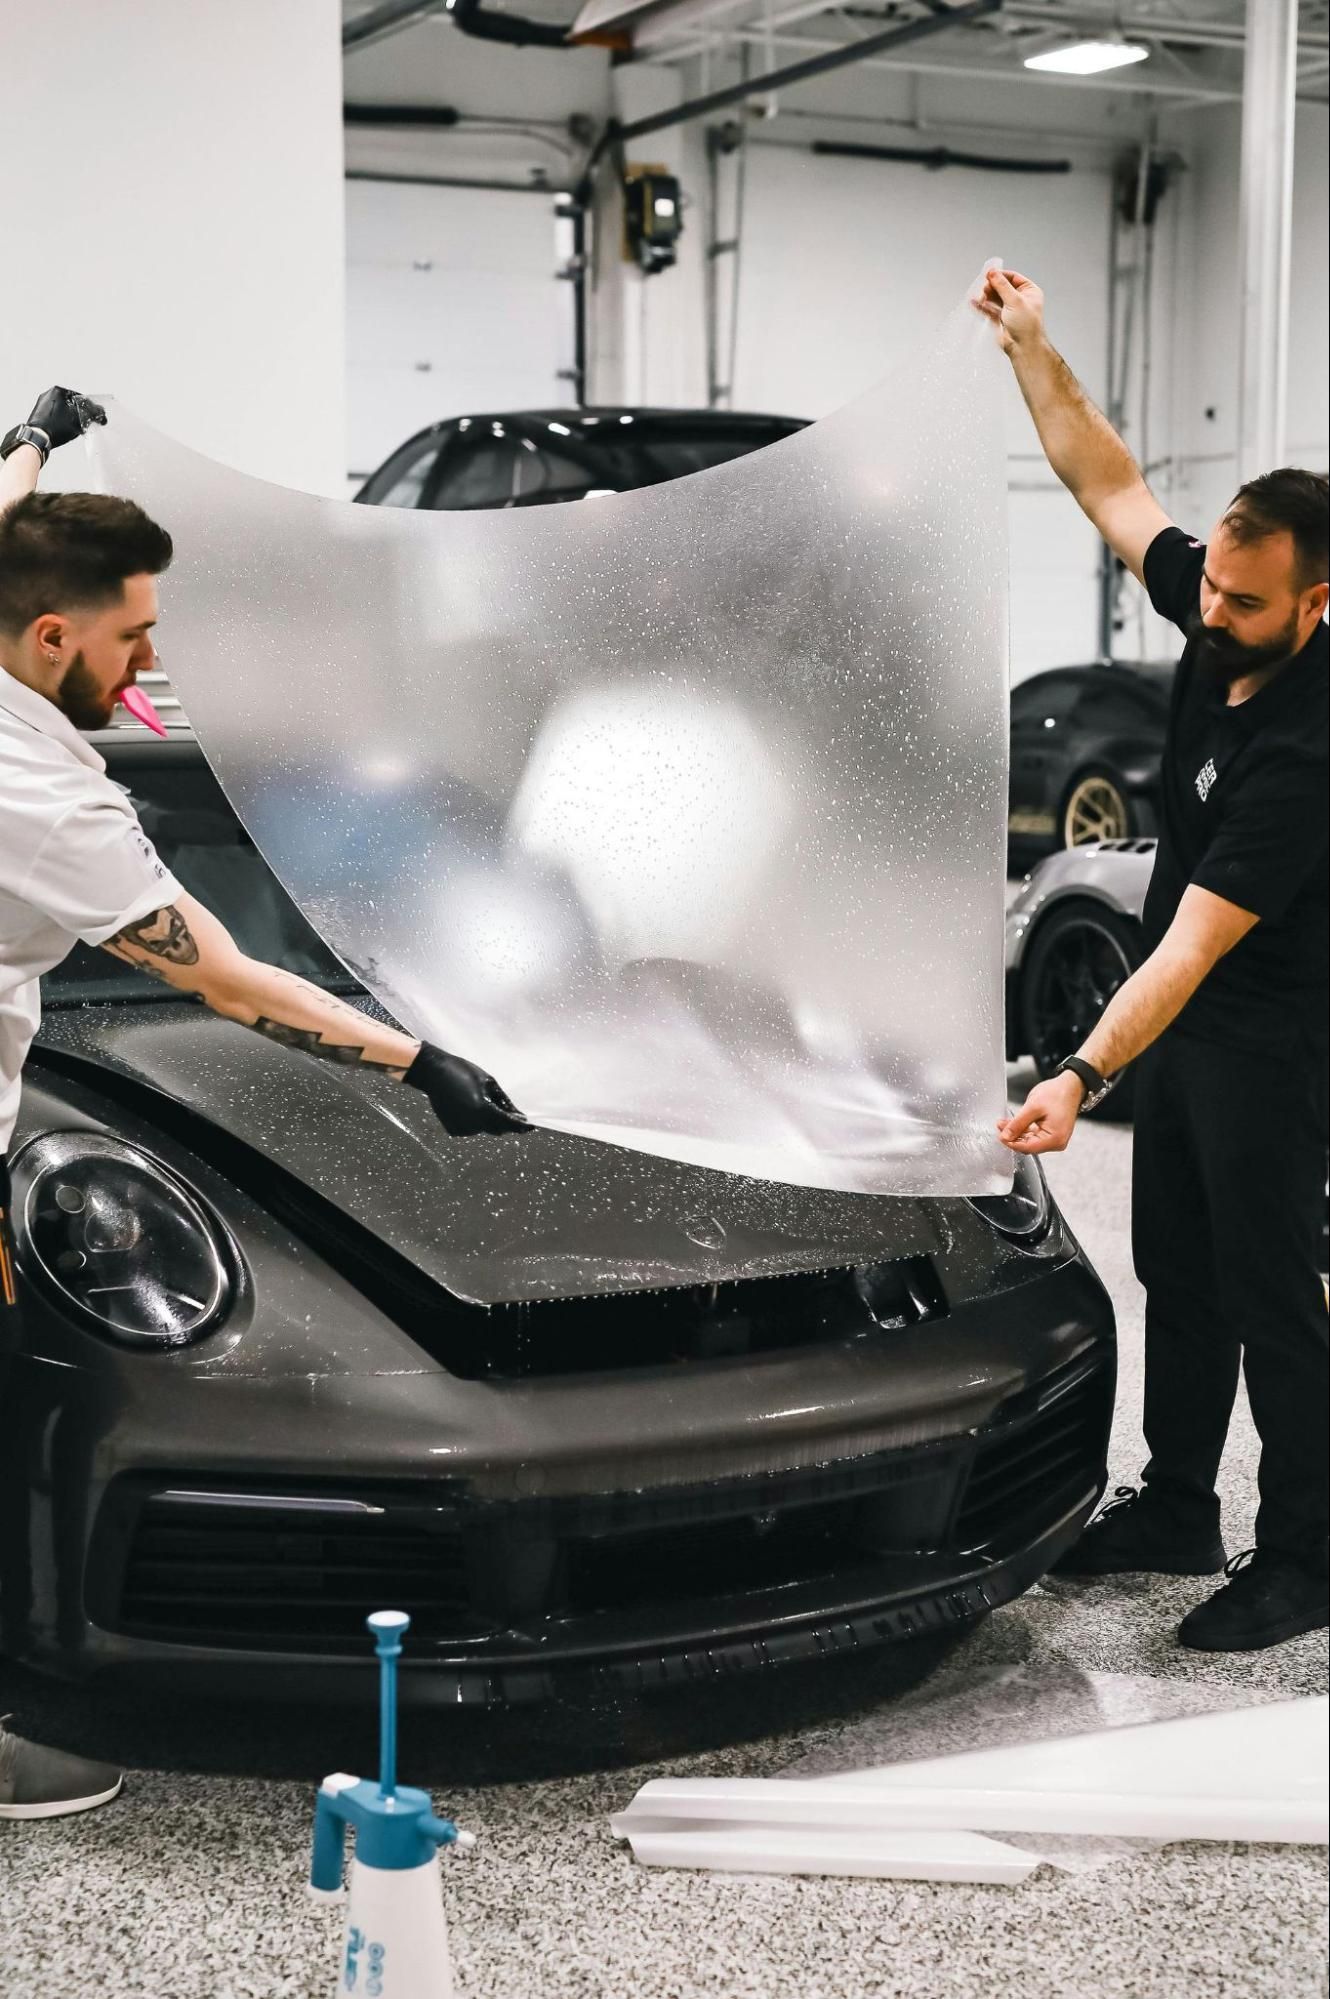
Step 3: Film Placement

With a steady hand, the film is laid over the treated surface. Adjustments are made to align edges, curves, and body lines perfectly before bonding begins.


Step 4: Squeegee Process

Working from the center outwards, we use a squeegee to remove moisture and air. Our technique applies even pressure to avoid stretch marks, bubbles, or fingers (raised edges that don’t adhere).


Step 5: Heat-Setting the Film

Edges, curves, and recessed areas are heated gently to activate the adhesive and shape the film snugly around contours. Heat also initiates the film’s self-healing layer for future scratch resistance.


Managing Edges and Air Bubbles


Clean edges and a bubble-free finish are signatures of a professional job. These minor yet crucial details can significantly impact the overall appearance and durability of a PPF installation. At Northern Lights Home & Auto Coatings, our experienced installers dedicate extra time and attention to refining edges and eliminating trapped air to ensure a flawless result. Proper edge wrapping not only enhances the aesthetic but also protects against premature lifting, while effective bubble management prevents weak spots that could compromise the film over time. By combining precision cutting, heat-setting techniques, and expert-level squeegeeing, we ensure that your PPF looks seamless and performs exactly as intended.


Edge Sealing


We trim excess film precisely and wrap it around edges for added durability. Heated edges are pressed into place with specialized tools, minimizing lifting due to weather or wash cycles. This step is especially important around high-contact areas like door edges, fenders, and hoods—where constant friction or wind pressure can cause film to peel if not properly sealed. At Northern Lights Home & Auto Coatings, we go a step further by contouring the film just past the panel edge when possible, creating a seamless, tucked finish that resists lifting and helps prevent dirt or moisture from creeping underneath. The use of controlled heat ensures the film softens just enough to mold snugly into shape without overstretching, preserving both adhesion and visual clarity.


Air Bubble Removal


While micro-bubbles are common immediately after installation, most dissipate within days as the film settles and moisture evaporates. A firm squeegee pass and a tiny pinhole help release trapped air from larger bubbles without causing damage to the film. Our technicians also use slip solutions strategically during installation to prevent bubbles from forming in the first place, allowing the film to glide into the correct position before adhesion begins. If a stubborn bubble is spotted during final inspection, we address it right away—because even a single trapped pocket of air can distort the finish or lead to premature wear. Our methodical approach and post-install checks ensure a clean, professional result that holds up under scrutiny and long-term use.


Post-Installation Care Tips

Professional installer applying paint protection film on car.

Proper aftercare extends the life of your investment and keeps your film performing like new. While professional installation lays the foundation for durability, how you care for your PPF in the days and months that follow is equally important. At Northern Lights Home & Auto Coatings, we educate every client on the best practices for maintaining their newly protected vehicle. With just a few thoughtful steps, you can preserve the film’s clarity, prevent damage, and maximize its protective qualities—ensuring your vehicle looks just as sharp years down the line as it did the day it left our shop.


First 48 Hours: No Washing

Avoid car washes or rain exposure during the initial curing period. This allows the film to bond fully to the surface.


Long-Term Maintenance

Use only pH-neutral soaps and soft microfiber mitts. Avoid abrasive cloths or harsh chemicals, which can dull the film over time. Drying with a clean microfiber towel helps avoid water spots and streaks.


Optional: PPF Sealants

Consider applying a film-safe ceramic sealant after 30 days. This boosts hydrophobicity and protects the film’s gloss against UV rays and pollutants.


Common Issues and Professional Fixes


Even the most carefully executed Paint Protection Film (PPF) installations aren’t completely immune to occasional issues. At Northern Lights Home & Auto Coatings, we emphasize not just flawless application but also long-term support—because we know that real-world conditions can sometimes create challenges. Whether it's caused by environmental stress, improper maintenance, or simply the natural settling process of the film, here are the most common post-installation concerns and how our professionals expertly address them:


  • Peeling Edges: Often caused by improper handling post-install or weather stress. We apply controlled heat to reseal or trim as needed.

  • Yellowing Film: Prevented by choosing non-yellowing, UV-stable films and ensuring regular washing.

  • Surface Stains: For bug splatter or tree sap, we recommend isopropyl alcohol on a microfiber towel—never scrub aggressively.

By catching these early, we help clients maintain the appearance and performance of their PPF for the long haul.


Trust the Experts at Northern Lights Auto Detailing


Applying Paint Protection Film isn’t just about product knowledge—it’s about craftsmanship, control, and care. With Northern Lights Home & Auto Coatings, your vehicle gets professional-grade protection backed by experience, precision tools, and premium film products. Whether you're protecting a brand-new ride or restoring brilliance to a daily driver, our team ensures each install is seamless, bubble-free, and built to last. Ready to give your vehicle the protection it deserves? Book your professional PPF service now at Northern Lights Home & Auto Coatings.

By SEO Team September 30, 2025
Transform your vehicle with premium vinyl wraps in Savannah, GA. Northern Lights offers gloss, matte, satin & custom finishes for style and lasting protection.
Paint Protection Film on car
By SEO Team September 29, 2025
Protect your car from chips, UV rays, and road damage with professional PPF in Savannah, GA. Northern Lights delivers expert installation for lasting shine.
white car
By SEO Team September 28, 2025
Keep your car glossy and protected year after year with ceramic coating in Savannah, GA from Northern Lights.
Window Tint Black Car
By SEO Team September 16, 2025
Protect your car’s interior from Savannah’s sun with professional window tint. Northern Lights Coatings blocks UV rays, reduces heat, and preserves value.
By SEO Team September 15, 2025
Selecting the right paint protection film (PPF) for your vehicle is more than a cosmetic choice; it’s a long-term investment in your car’s appearance and value. In Savannah, GA, vehicles face a mix of sun exposure, coastal humidity, and environmental debris that can damage paint over time. Choosing the ideal PPF involves understanding the differences in film thickness, finishes, and warranties. At Northern Lights Home & Auto Coatings, we guide vehicle owners through this process, ensuring every car receives tailored protection that suits both its style and the driver’s lifestyle. Why PPF Selection Matters Choosing the wrong paint protection film can lead to uneven coverage, insufficient protection, or unnecessary expense. Proper selection guarantees your vehicle is safeguarded against rock chips, and environmental wear while maintaining a polished, professional look. In Savannah’s unique climate, factors like salt from the coast, frequent sun exposure, and urban debris play a significant role in determining the best PPF for your vehicle. Professional guidance ensures that the film’s thickness, finish, and warranty are matched to your car’s needs for optimal performance and long-lasting results. Understanding PPF Thickness Options Thin vs. Thick PPF Paint protection films come in various thicknesses, each designed to offer different levels of protection. Thicker films provide superior impact resistance, ideal for high-traffic areas like hoods, bumpers, and side mirrors, where stone chips and road debris are common. Thinner films, meanwhile, are better suited for full-body applications or areas where flexibility and a seamless appearance are priorities. In Savannah, selecting the correct thickness ensures your vehicle is protected without compromising the visual appeal or performance of the film. Choosing the Best Thickness for Your Vehicle Determining the ideal PPF thickness depends on factors such as vehicle type, daily driving environment, and personal priorities. Northern Lights Home & Auto Coatings evaluates each vehicle and considers the owner’s driving habits to recommend the perfect thickness. This tailored approach ensures high-impact areas receive maximum protection while maintaining a smooth, invisible finish in less exposed regions. A carefully chosen thickness balances durability, aesthetics, and cost-effectiveness, giving your vehicle the protection it deserves. Exploring Different PPF Finishes Gloss Finish Gloss finishes are designed to enhance the reflective quality of your car’s paint, offering a sleek and high-end appearance. For Savannah residents who take pride in their vehicle’s polished look, gloss PPF enhances depth and clarity, making the car appear freshly detailed at all times. This finish is especially popular for sports cars and luxury vehicles, providing both protection and a showroom shine that stands out on city streets and coastal roads. Matte and Satin Finishes Matte and satin PPF finishes provide a unique, modern aesthetic while still maintaining robust protection. These finishes reduce glare and offer a distinctive appearance that differentiates your vehicle from the standard glossy look. While matte films may require slightly more maintenance to avoid visible fingerprints or streaks, the visual impact is unmatched. Satin finishes strike a balance, offering subtle sheen with added durability, making them ideal for vehicle owners seeking style without compromising protection. Choosing the Right Finish for Your Lifestyle Selecting a finish should align with both your personal taste and practical needs. Consider driving conditions, exposure to sunlight, and the type of traffic your vehicle encounters regularly. Northern Lights Home & Auto Coatings assists clients in evaluating these factors, ensuring the chosen finish complements the car’s aesthetic while providing the necessary protection for long-term durability. The right finish enhances both the appearance and resilience of your vehicle’s exterior.
By SEO Team September 14, 2025
Learn how to prep your car for professional ceramic coating in Savannah, GA. Northern Lights Home & Auto Coatings ensures lasting protection and a flawless finish.
By SEO Team August 14, 2025
Window tint is one of the most popular upgrades for vehicle owners in Savannah, GA. It offers more than just a sleek look—it can reduce glare, block harmful UV rays, keep the interior cooler, and provide added privacy. But as with any investment in your vehicle, you might wonder: how long does window tint last ? At Northern Lights Home & Auto Coatings , we’ve seen firsthand that the answer depends on a few key factors, including the quality of the tint, the installation process, and how the vehicle is maintained over time. In this article, we’ll break down the typical lifespan of professional versus DIY window tint, the signs your tint is aging, and how expert installation can give you better clarity, longer performance, and legal peace of mind. Understanding the Lifespan of Window Tint Window tint isn’t a permanent feature—it has a natural lifespan. While some tints can last for many years without issue, others may start showing wear much sooner. The main difference comes down to material quality and installation technique . At Northern Lights Home & Auto Coatings , we use high-grade window films designed to withstand Savannah’s humid climate and intense sun exposure. Cheap films, often used in DIY kits or low-cost installations, tend to break down much faster because they lack the durability and UV-resistant properties found in premium products. Factors That Affect How Long Window Tint Lasts Quality of Film The film itself plays the biggest role in determining longevity. High-performance films made with advanced dyes, metals, or ceramic particles resist fading and bubbling much longer than budget films. Premium ceramic tints, for example, can maintain their appearance and performance far longer than dyed films. Installation Expertise Even the best film can fail early if it’s not installed correctly. Professional installers like our team at Northern Lights Home & Auto Coatings use precision techniques to ensure the tint adheres smoothly, without air pockets or contaminants that can cause early deterioration. Exposure to the Elements Savannah’s sunny days are beautiful, but constant UV exposure is tough on tint. Heat and sun can accelerate the breakdown of lower-quality films. Parking in shaded areas or using a windshield sunshade can help slow the process. Maintenance and Cleaning Gentle cleaning methods extend the life of your tint. Using ammonia-free cleaners and soft microfiber cloths helps prevent scratches and cloudiness.
Paint Protection Film
By SEO Team August 14, 2025
Learn common mistakes that damage Paint Protection Film and expert tips to keep your PPF looking new for years.
By SEO Team August 11, 2025
A professional ceramic coating can transform your car’s appearance and protect its finish for years, but the quality of the results often depends on how well the vehicle is prepared beforehand. If you’re in Savannah, GA, and planning to bring your car to Northern Lights Home & Auto Coatings for a ceramic coating service , you can take a few steps at home to ensure the best possible outcome. Proper washing, decontamination, and surface preparation help the coating bond better, leading to enhanced shine and durability. In this guide, we’ll walk you through the essential ceramic coating prep steps you can do yourself before handing your car over to the pros. We’ll also explain how professional detailers handle the final touches to achieve a flawless finish. Understanding Why Prep Matters for Ceramic Coating Before diving into the actual prep process, it’s important to understand why it’s necessary. Ceramic coating is a semi-permanent layer that bonds to your car’s paint, creating a hydrophobic surface that resists dirt, water spots, UV rays, and contaminants. However, for the coating to bond effectively, the paint surface needs to be clean, smooth, and free of imperfections. If dirt, tar, or old wax remain on the surface, they can prevent proper adhesion, causing the coating to fail prematurely. Even microscopic contaminants can create uneven spots, which means you won’t get the maximum protection or shine you’re paying for. This is why taking the time to properly prepare your car at home—and then letting a professional finish the job—makes such a difference. Step 1: Start with a Thorough Wash Washing your vehicle is the foundation of ceramic coating prep. The goal here is to remove surface dirt, dust, and loose contaminants so that deeper cleaning and decontamination are more effective. When washing your car before a ceramic coating appointment in Savannah, GA, it’s best to use a pH-neutral automotive shampoo. Avoid dish soaps or harsh detergents that can strip away necessary layers in an uncontrolled way. Work from top to bottom, using the two-bucket method—one bucket for clean, soapy water and another for rinsing your wash mitt—to prevent swirl marks. Pay special attention to crevices, door jambs, and areas around badges, as dirt tends to accumulate in these spots. After washing, rinse the car thoroughly to ensure no soap residue is left behind. Dry the surface with a clean microfiber towel to avoid water spots, which can interfere with the coating process. Step 2: Decontaminate the Paint Even after washing, your paint may still have embedded contaminants that aren’t visible to the naked eye. These can include industrial fallout, brake dust, tree sap, and road tar. If left on the paint, they will interfere with the coating’s bond. To handle this, you can use an iron remover product designed for automotive surfaces. Spray it evenly across panels, let it dwell for the recommended time, and rinse thoroughly. The chemical reaction will dissolve iron particles and other stubborn contaminants that a wash alone can’t remove. This step is especially important in coastal and humid climates like Savannah, where environmental contaminants can settle quickly on vehicles. By performing this step at home, you’re giving your professional ceramic coating service the best possible starting point. Step 3: Clay Bar Treatment A clay bar treatment goes a step further in smoothing the surface. It works by physically pulling out any remaining particles from the clear coat, leaving a glass-like finish. Using a clay bar or synthetic clay mitt, apply a lubricant (usually a detailing spray) to a small section of the car, then glide the clay over it using light pressure. You’ll feel resistance at first, but as contaminants are removed, the surface will become smooth. Wipe away residue and move to the next section until the entire car is clayed. This step is crucial because ceramic coating bonds best to a perfectly smooth, contaminant-free surface. Skipping it can leave tiny particles trapped under the coating, diminishing its durability and visual impact. Step 4: Light Polishing for Surface Correction While not always necessary for DIY prep, light polishing can help remove minor swirl marks, oxidation, or water spots before the coating process. If your car’s paint is already in good condition, you may not need this step—but if you notice visible imperfections, correcting them now will make your ceramic coating look even better. For light polishing, use a dual-action polisher and a fine finishing polish. Work in small sections, applying steady, even pressure. Once finished, wipe the surface with a clean microfiber towel. Be cautious—heavy paint correction should be left to professionals, but a light polish can significantly improve the final results. Step 5: Final Cleaning Before Handing It to a Pro Once you’ve completed washing, decontamination, clay barring, and light polishing, it’s time for the final cleaning step before bringing your car to Northern Lights Home & Auto Coatings . This is where you remove any remaining oils, residues, or polishing compounds from the paint. A quick wipe-down with an isopropyl alcohol (IPA) solution is ideal. Mix a 50/50 solution of IPA and distilled water in a spray bottle, mist it onto a panel, and wipe it clean with a microfiber cloth. This ensures the surface is completely bare, allowing the ceramic coating to form a strong chemical bond.
A blue sports car is parked in front of a house.
By SEO Team July 9, 2025
Best Window Tint for Privacy: Films for Homes and Vehicles